Ruby on Rails

  1. Ruby On Rails


    1. Ruby On Rails とは

       Ruby はWebアプリケーションを構築するためのフレームワーク(骨組み)です。Rails は Ryby 言語でかかれ、web2.0 アプリケーションを構築するための最適なフレームワークといわれています。

    2. Railsのアーキテクチャ

       RailsアプロケーションはMVC(Model-View-Controller)モデルに基づいて実装されます。各部品を生成するための場所は定まっており、自動的に生成されます。また、テストのためのフレームワークもくみこまれています。

    3. 出典

       この内容やサンプルは、Dave Thomas らによる「Agile web Development with Rails」です。

    4. インストール

       Rails には、Apache(webサーバー)、SQL(データベース)、Ruby、Ruby On Rails、が必要です。WindowS で開発する場合一括して、InstantRails として組み込むことができます。ただし、予め組み込まれているシステムは削除しておくことが必要です。

  2. 簡単な表示アプリ


    1. 簡単な表示

      webに簡単な表示を行うアプリを作成します。

    2. 起動

       InstantRailsフォルダのInstantRails.exe を起動します。下のウインドウが起動し、Apache、MySql、を起動します。「I」のボタンから、「RailsApplication」>「Open Ruby Console」を選択すると、コンソールウインドウが開きます。
      以後、ここから、指示を出します。


    3. アプリの作成

       適当なフォルダ(work)を作成し、以下の rails コマンドで demo アプリを生成します。demo フォルダに36のフィルだと45のファイルが生成されます。
      C:\InstantRails\work>rails demo
      ....
       C:\InstantRails\work\demo のディレクトリ
      [.] [..] [app] [components] [config] [db]
      [doc] [lib] [log] [public] Rakefile README
      [script] [test] [tmp] [vendor]

      >ruby script/server コマンドで、Mongrel サーバーがポート3000で起動します。
      C:\InstantRails\work\demo>ruby script/server
      => Booting Mongrel (use 'script/server webrick' to force WEBrick)
      => Rails application starting on http://0.0.0.0:3000
      => Call with -d to detach
      => Ctrl-C to shutdown server
      ** Starting Mongrel listening at 0.0.0.0:3000
      ** Starting Rails with development environment...

      webブラウザで、 http://localhost:3000 で起動画面を表示することができます。


      web に hello を表示するよう、demoアプリを追加します。アプリの controller に say ソースを生成するため、以下のコマンドを出します。
      C:\InstantRails\work\demo>ruby script/generate controller say
            exists  app/controllers/
            exists  app/helpers/
            create  app/views/say
            exists  test/functional/
            create  app/controllers/say_controller.rb
            create  test/functional/say_controller_test.rb
            create  app/helpers/say_helper.rb

      app/controllers/say_controller.rb 以外に、テストとヘルパの .rb(ルビーファイル)が生成されています。say_controller.rb  はsay_controller クラスを定義します。 ここに メソッド hello を定義します(中央の2行を追加します)。
      class SayController < ApplicationController
       def hello
       end
      end
       これで、 http://localhost:3000/say/hello 画面のコントローラが作成できます。この画面のテンプレート(MVCモデルの View)ファイル app/views/say/hello.rhtml を以下のように作成します。
      <html>
       <head>
        <title> Hello</title>
        </head>
        <body>
          <h2> hello from Rails</h2>
        </body>
      </html>

      ruby script/server でサーバーを起動し、ブラウザのURLを http://localhost:3000/say/hello とします。これで、下記のページが表示されます。

       
       正しく表示されない場合、ファイルを書き直し、ブラウザを更新すれば画面が修正されます。Rails を再起動する必要はありません。.rhtml の書式は html ですが、Ruby のプログラムを組み込むことができます。
      ととえば、メソッド hello で時刻を 変数 @time に記録し、
      class SayController < ApplicationController
       def hello
        @time=Time.now
       end
      end

      hello.rhtml を以下のように変更します。<%  %> が、ruby の組み込み部分です。
      <html>
       <head>
        <title> Hello</title>
        </head>
        <body>
          <h2> hello from Rails</h2>
          時刻: <%= @time %>
        </body>
      </html>

      二つのファイルを修正し、ブラウザを更新すると、画面が変わります。ここで、漢字を利用する場合、コードを utf-8 で保存します(TeraPad の場合、「漢字コード指定保存」を利用)。


      この、機能で Ruby での処理結果を ホームページに反映することが可能です。

  3. モデルとデータベース


    1. データベースを利用する

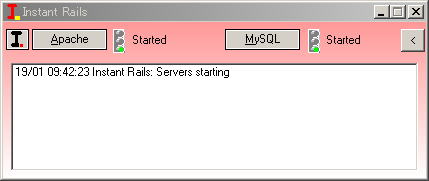
       Rails の特徴に一つにデータベースとの連結機能があります。ここでは、商品管理を行う depot アプリを作成します。まず、depot アプリを生成します。
      C:\InstantRails\work>rails depot
            create
            create  app/controllers
            create  app/helpers

      このアプリでは、depot_development の名前で データベースを参照します。次に、MySql でデータベースを作成します。mysql -u root コマンドで ユーザ名 root 、パスワードなしでログインします。mysql> のプロンプトに対し、
      create database depot_development;
      で、データベースを作成します。mysql のコマンドでは最後に ; が必要です。show databases; で作成したデータベースを確認できます。exit でmysql を終了します。
      C:\InstantRails\work>mysql -u root
      Welcome to the MySQL monitor.  Commands end with ; or \g.
      Your MySQL connection id is 2 to server version: 5.0.27-community
      
      Type 'help;' or '\h' for help. Type '\c' to clear the buffer.
      
      mysql> create database depot_development;
      Query OK, 1 row affected (0.00 sec)
      
      mysql> show databases;
      +--------------------+
      | Database           |
      +--------------------+
      | information_schema |
      | cookbook           |
      | depot_development  |
      | mysql              |
      | typo               |
      | typo_dev           |
      | typo_test          |
      +--------------------+
      7 rows in set (0.06 sec)
      
      mysql> exit
      Bye
      
      C:\InstantRails\work>

       以後、テーブル、コラムの作成が mysql> コマンドでも可能ですが、Rails では、Ruby のメソッドで行うことができます。Ruby から実行することで、履歴が残り再実行ができます。

    2. モデルを作成

       まず、model の product のスクリプトを生成します。このスクリプト生成機能で、MVC モデルを維持することができます。これで、データベースに product テーブル(Excelの表に相当)が生成されます。
      C:\InstantRails\work\depot>ruby script/generate model product
            exists  app/models/
            exists  test/unit/
            exists  test/fixtures/
            create  app/models/product.rb
            create  test/unit/product_test.rb
            create  test/fixtures/products.yml
            create  db/migrate
            create  db/migrate/001_create_products.rb

       次に、データベースのマイグレーション(「移動」の意味)を行います。work\depot\db\migrate\001_create_products.rb を次のように編集し、テーブルにコラム(Excelの列に相当)を追加します。
      class CreateProducts < ActiveRecord::Migration
        def self.up
          create_table :products do |t|
            t.column :title,  :string
            t.column :description,  :text
            t.column :image_url,   :string
          end
        end
        def self.down
          drop_table :products
        end
      end

      次に、rake db:migrate でこの内容をデータベースに反映させます(rake は「かき集める」の意味)。
      C:\InstantRails\work\depot>rake db:migrate
      (in C:/InstantRails/work/depot)
      == CreateProducts: migrating =======================
      -- create_table(:products)
         -> 0.0310s
      == CreateProducts: migrated (0.0310s) ==============

    3. コントローラの生成

      次にMVCモデルのコントローラの admin を生成します。
      C:\InstantRails\work\depot>ruby script/generate controller admin
            exists  app/controllers/
            exists  app/helpers/
            create  app/views/admin
            exists  test/functional/
            create  app/controllers/admin_controller.rb
            create  test/functional/admin_controller_test.rb
            create  app/helpers/admin_helper.rb

      生成される、app/controllers/admin_controller.rb に1行追加します。scaffold は「足場」の意味です。
      class AdminController < ApplicationController
       scaffold :product
      end

       これで、データベースの表示、編集、をするページが生成されます。
      C:\InstantRails\work\depot>ruby script/server
      => Booting Mongrel (use 'script/server webrick' to force WEBrick)
      => Rails application starting on http://0.0.0.0:3000
      => Call with -d to detach

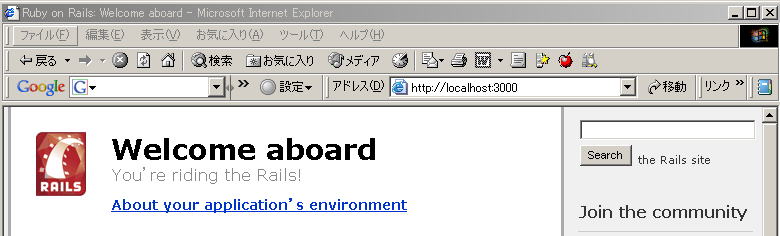
      で、Rails を起動し、 ブラウザのURLを http://localhost:3000/admin とします。以下のページが表示され、New product で、製品を入力するページが表示されます。

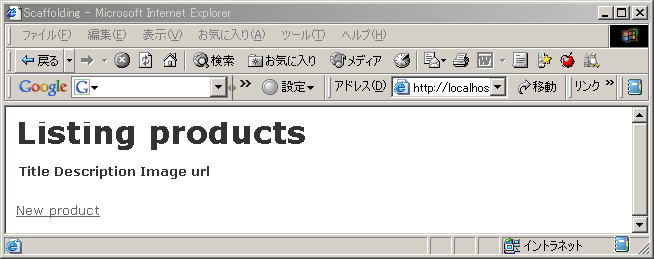
       項目を入力し、「create」ボタンを押せば、製品が表示されます。この画面から「編集」も可能です。

    4. 空入力のチェック

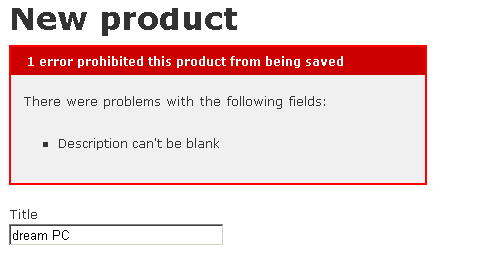
       必須項目の入力がない場合、データ生成を防ぐには、depot\app\models\product.rb に次の1行を加えます。
      class Product < ActiveRecord::Base
        validates_presence_of :title, :description
      end

       この設定後、description を空行で create すると、以下のメッセージがでて、保存されません。


    5. データベースの変更

       データベースに新しい項目を追加するには、migration にスクリプトを追加します。
      C:\InstantRails\work\depot>ruby script/generate migration add_price
            exists  db/migrate
            create  db/migrate/002_add_price.rb

       ここで、 002_add_price.rb の先頭の 002 はデータベースの履歴番号で、この番号により必要な更新作業を行うことができます。db/migrate/002_add_price.rb を下記のように編集します。
      class AddPrice < ActiveRecord::Migration
        def self.up
          add_column:products, :price, :decimal, :precision => 8, :scale => 2, :default => 0
        end
      
        def self.down
          remove_column:products, :price
        end
      end

      rake db:migrate でデータベースを更新します。
      C:\InstantRails\work\depot>rake db:migrate
      (in C:/InstantRails/work/depot)
      == AddPrice: migrating ========================================================
      -- add_column(:products, :price, :decimal, {:precision=>8, :scale=>2, :default=>
      0})
         -> 0.0630s
      == AddPrice: migrated (0.0630s) ===============================================

       ruby script/server/admin でサーバーを起動し、ホームページを更新すると、price の項目追加が確認できます。